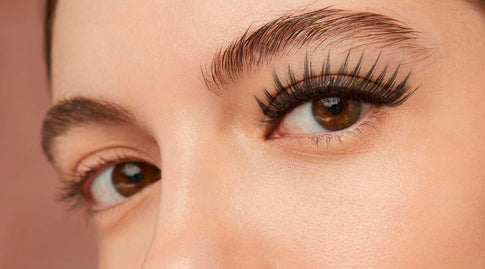
How To Apply Wispy Lash Extension: Step-by-Step Tutorial for Beginners
First things first when it comes to knowing how to apply wispy lashes… It is the process as applying all of our segment eye lashes! Practice makes perfect! There are some things that may change, and that only depends on the type of lashes you’re applying and the number of segments the style has.
Remembering what we said before, there are three kinds of wispy lash extensions. You have the classic, volume, and then the hybrid. The difficulty of laying on wispy eyelash extensions ranges depending on that!
We won’t be getting into too much detail on lash mapping or any other niche techniques here - however you can certainly design your own mapped look - that is the beauty of segment lashes!!
How To Apply Wispies: The Tools of the Trade
We would recommend a good pair of tweezers or applicators to apply the lashes. These applicators are perfectly designed to make the application easy for either eye. There are some who like to simply use their fingers to put on wispy eyelash extensions. For the sake of cleanliness and ease, we urge you to pick up a pair of tweezers or applicators…especially for the final pinch!
Lash applicatorLash Applicator - The Perfect tool designed for Application of Method Lash Clusters
£9.93
OH and get yourself situated in front of a mirror. Now that’s out of the way, let’s get lashing!
The Process of How To Apply Wispy Lash
Step 1: Prep Work
Gather everything we mentioned above, clean out the tools, and lay them all down. Simple as that. Clutter = panic.
Step 2: Assess the Situation
Grab one of your wispy eyelash extensions and hover them over your eye(lid). This both gets you acclimated on how to place your lashes. Check out how your lashes look when you lay them on. Wispy lashes are combinations of individual lashes - you need to see how they potentially look before you commit.
We know that this may be a difficult task for beginners, but we have a helpful tip! Check out your natural lashes and see where they may look fuller. Concentrate (but not too much!) individual lashes on said areas and you’ll get the look soon after!
Step 3: To Curl or Not to Curl
We thought it would be nice to mention it here. Generally, it is taboo to curl your lash extensions. So, best to resist temptation! Even professionally laid lashes look bent when you curl them at times. Think of how your beginner lashes would fare if you did the same!
On another note, avoid curling your natural lashes as well. This may mess the look up for you, having curled and uncurled lashes. You want them to look natural! Also, this may make applying lashes more difficult.
Step 4: Commit!
When all’s said and done, you really just have to commit. Just apply a small amount of glue and apply the lash one at a time. One tip we often get is applying the glue on the back of your hand so you can simply dab and go.
It may look a bit weird at the beginning, but the lashes will blend if you do it right! Trust the process!
Wispy Wonderland
If the steps sound similar to basically applying full eyelashes, that’s because it kind of is. Applying wispy lashes just requires more back and forth. We know the other blogs and tutorials may make it look daunting and difficult, but we believe in you!


